

Add Attachments
By Khadija AhmedPublished 25 Jan 2024Updated 25 Jan 20241 min read
According to the process, all purchase requisitions, petty cash (Invoice signed by manager) and direct billings on Microsoft Dynamics 365 should include an attachment., therefore, this user manual should help you attach files to your PRs, when required.
- Open Dynamics 365 application URL provided by the office of IT, and Log in with your credentials (username and password).
- Click on the request you would like to attach file to it.
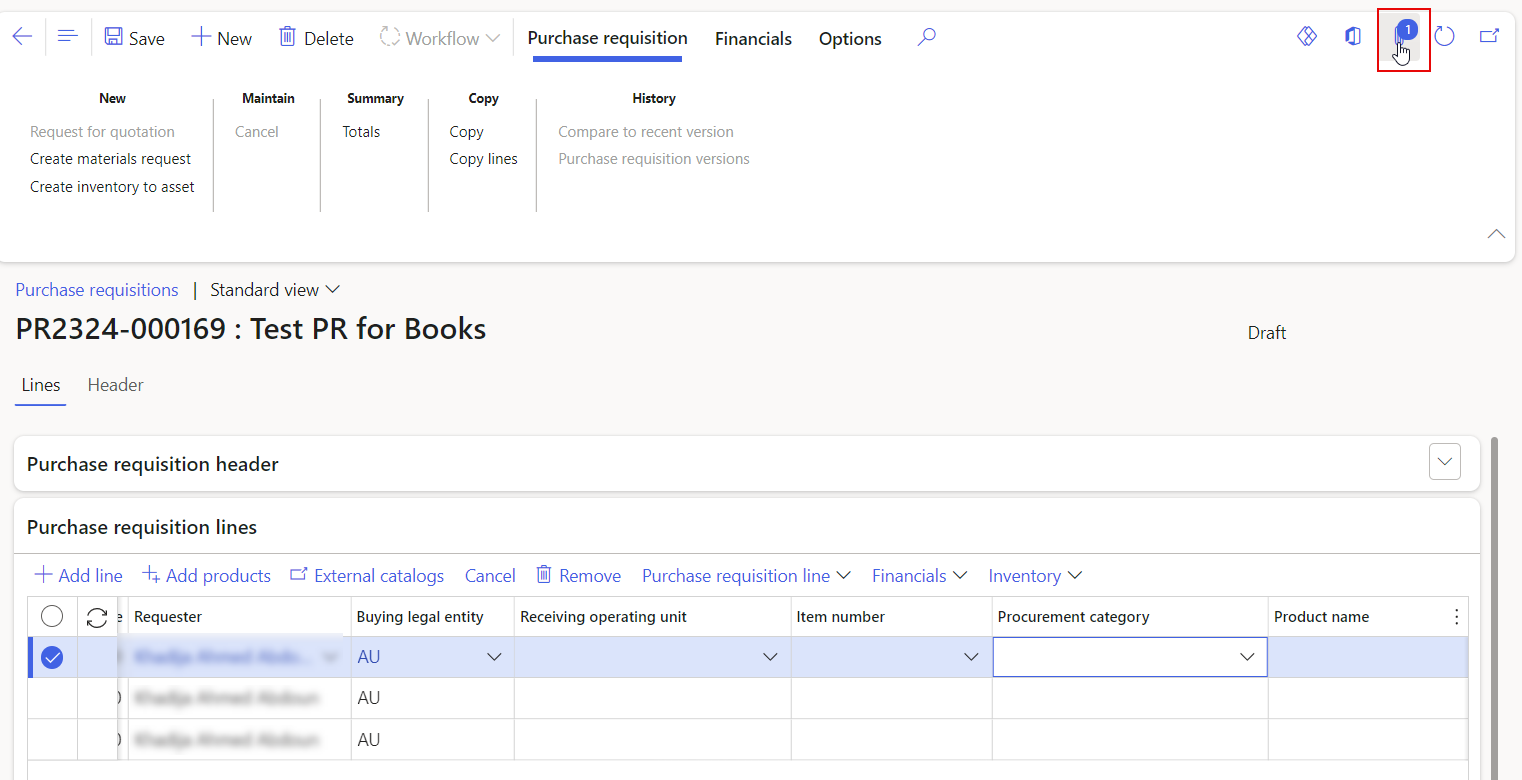
- Select the line you would like to add the attached to, then click on the attachment button, and you will be directed to another page to add your attachment.
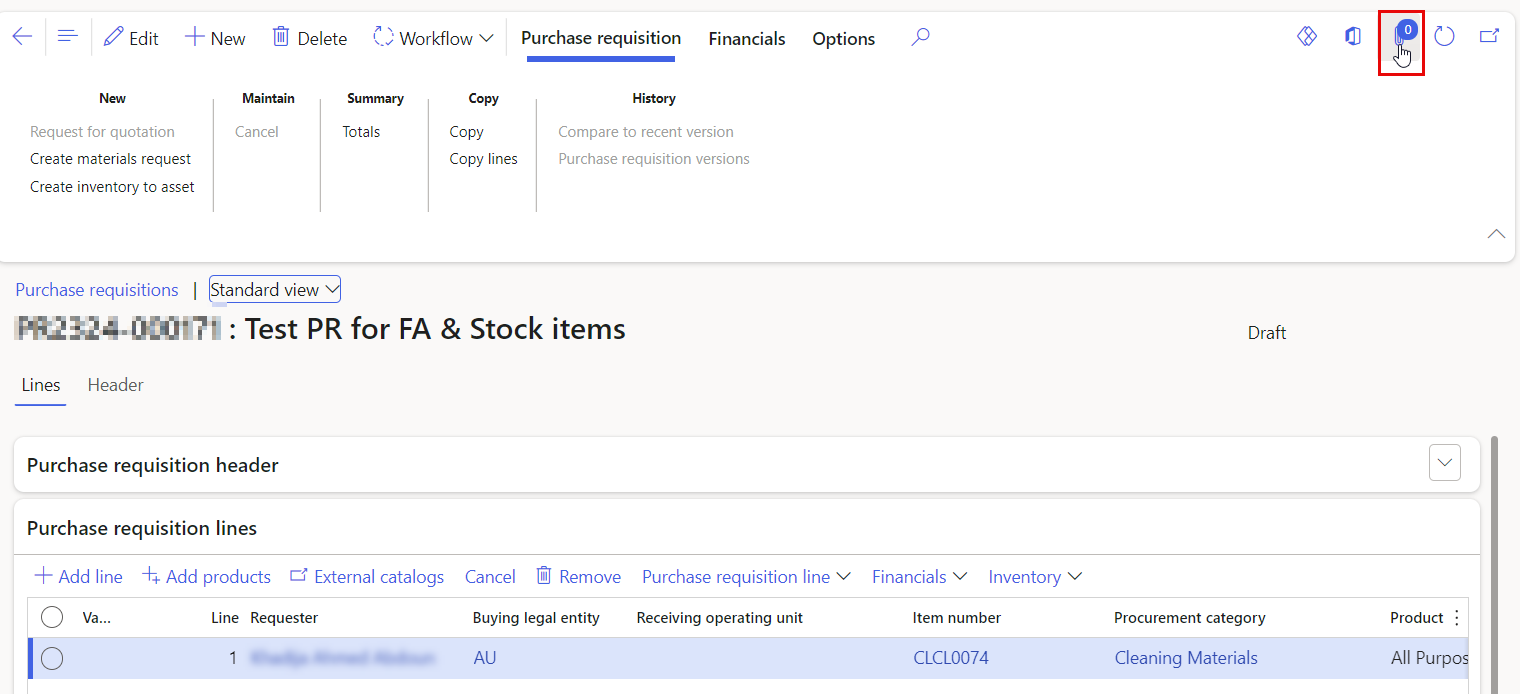
Note:
In case the request have more than one line, make sure to select the line first, then attach the file. - Click the New button, then click on File.
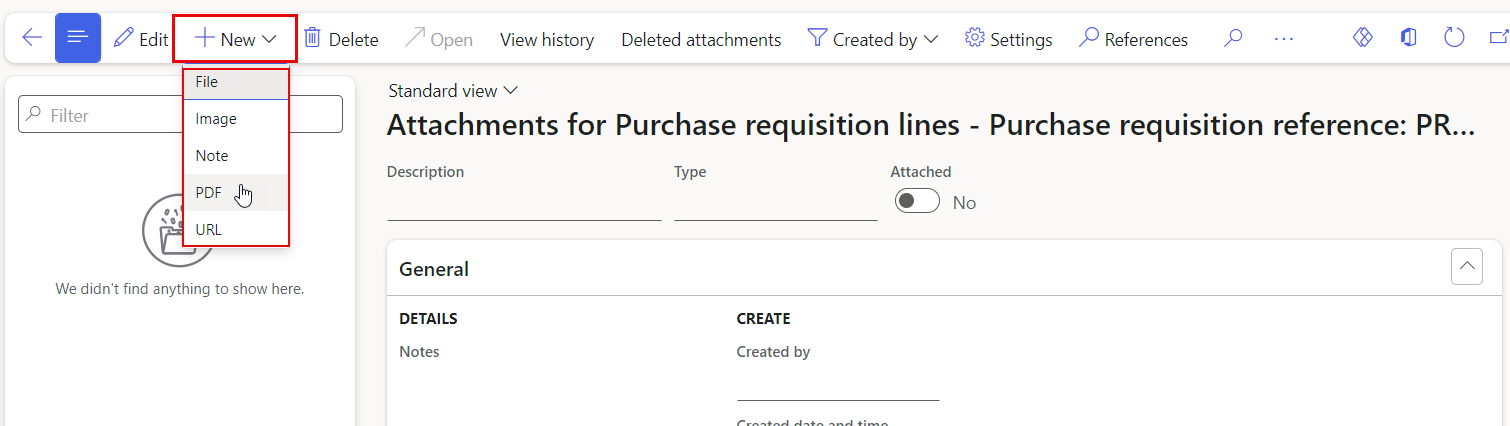
Note:
- Attachments in Dynamics 365 enable you to include various types like: files, notes, images, PDFs, and URLs.
- The maximum size of the attached file is 128 MB. - Click on Browse, then Find the file in your PC, and click on the Open button, then click on "Save".
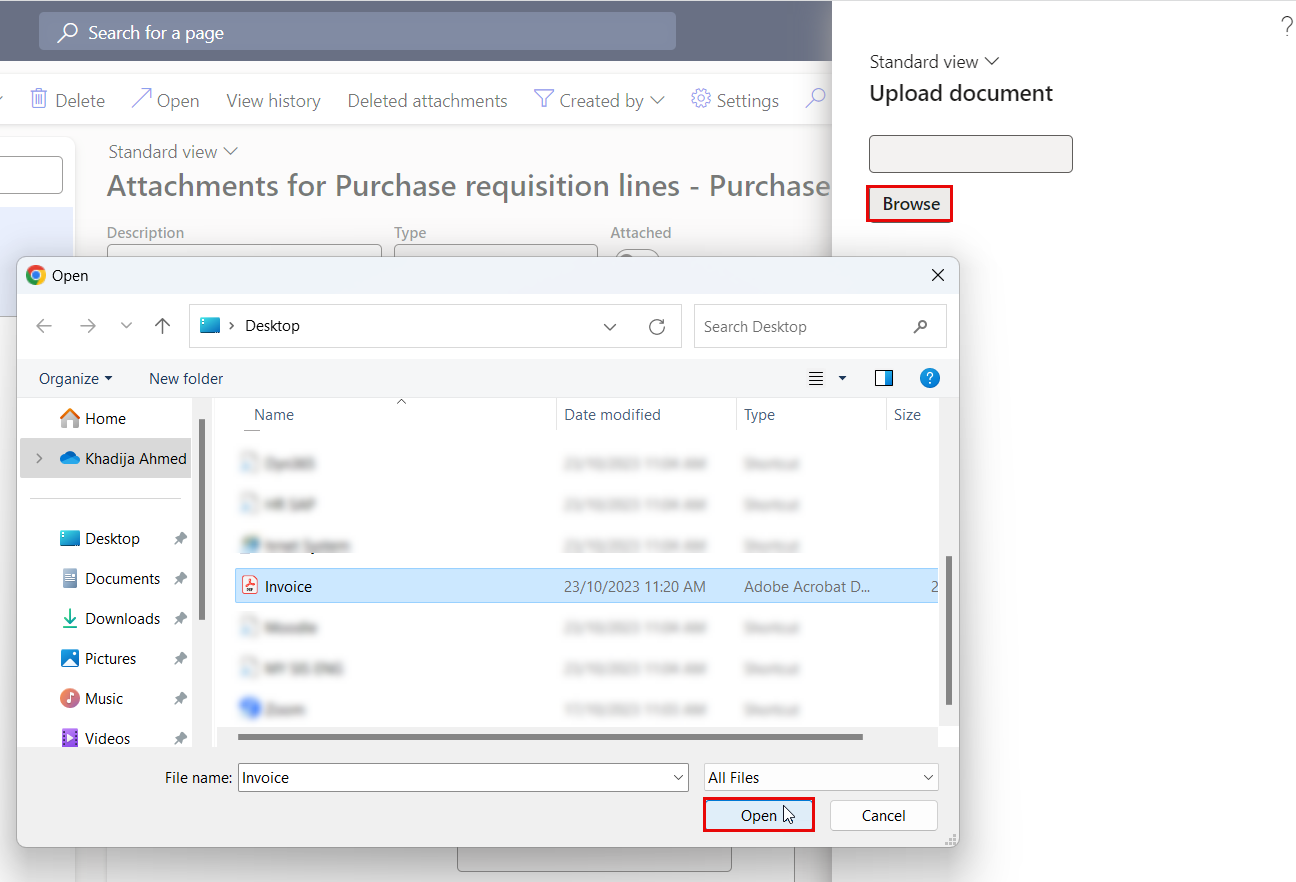
- Click on the "Save" button.
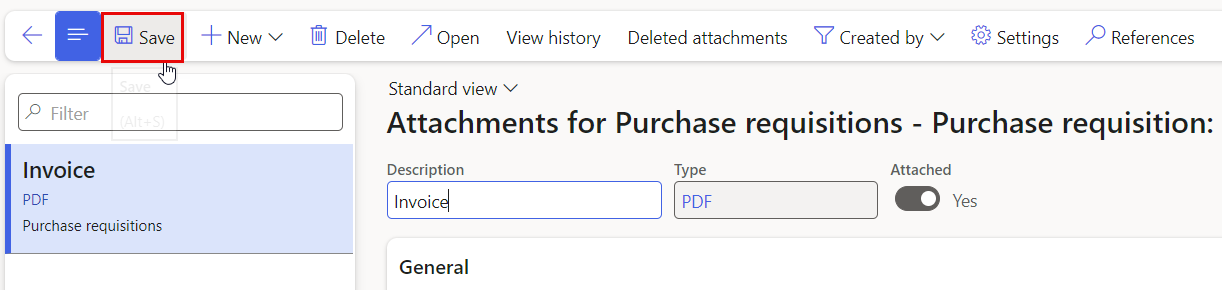
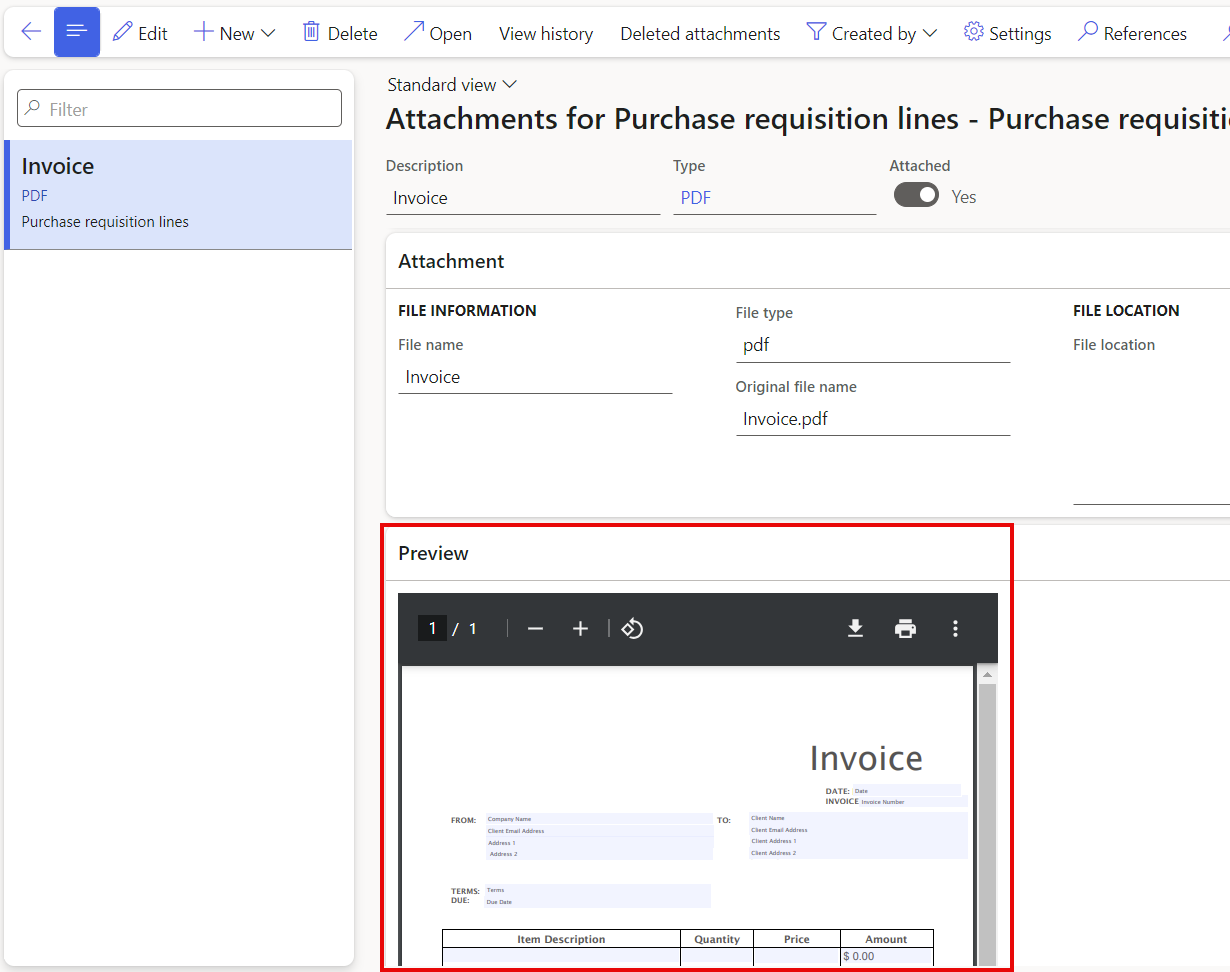
- Once you attach the file, the following screen will be displayed, allowing you to preview the attachment and view details such as the file name and file type.
- Now the request will updated with the attachment for the selected line.
Was this article helpful?
Related articles
Finance and Procurement Process
Original source: https://it.ajman.ac.ae/docs/add-attachments-1