


Grade Entry
By Khadija AhmedPublished 12 Jul 2021Updated 21 Aug 20253 min read
This feature of Banner allows you to reflect your students’ grades on the system. And there are two ways of doing this, you can either enter the grades for a batch of students at once through an Excel sheet, or enter it manually. The later is advised to be used when you would like to enter/update a grade for very few students.
Important Note:
- The option to enter grades for a batch of students at once is restricted to full-time faculty members only.
- Part-time faculty members are requested to enter the gardes manually.
Enter the Grades for a batch of students at once
To use this method of grade entry, you need to access Argos, Microsoft Excel, and Banner by following the below steps:
Access the Grade Entry Sheet on Argos
- You can access Argos through this link or through Banner’s home page or as illustrated below:
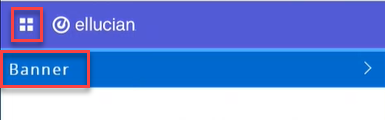
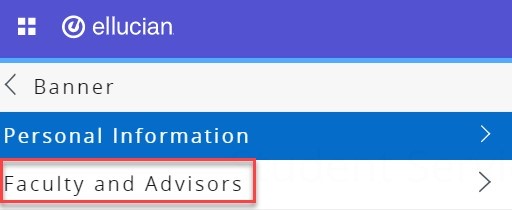
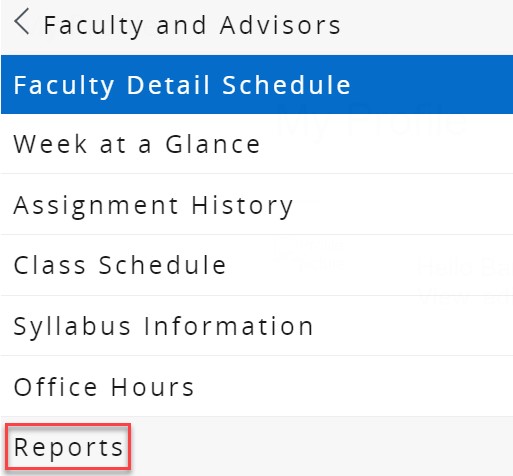
- Click on Argos Web Viewer.
- Go to Faculty folder.
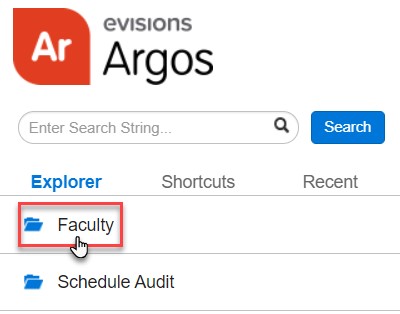
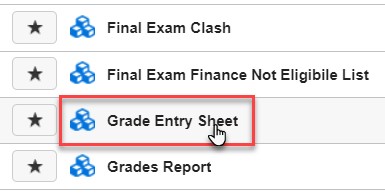
- Click on the Grade Entry Sheet.
- By default, the current semester is chosen. Choose the Exam Type, which reflects the grades you’d like to enter.
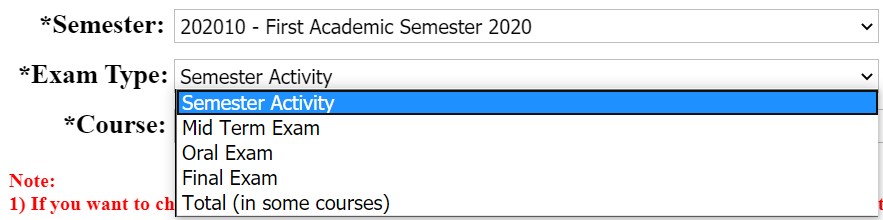
- Choose the course.
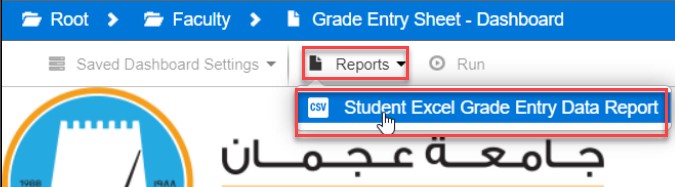
- From the navigator, click on Reports and then on Student Excel Grade Entry Data Report.
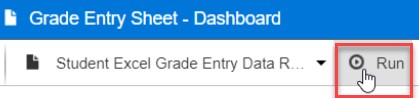
- Click on Run, as illustrated below. This will download a predefined Excel Sheet with a list of all the students in the specified course. Kindly use this sheet to proceed to the next steps.
Fill and save the Grade Entry Sheet
- Open the downloaded Excel sheet.
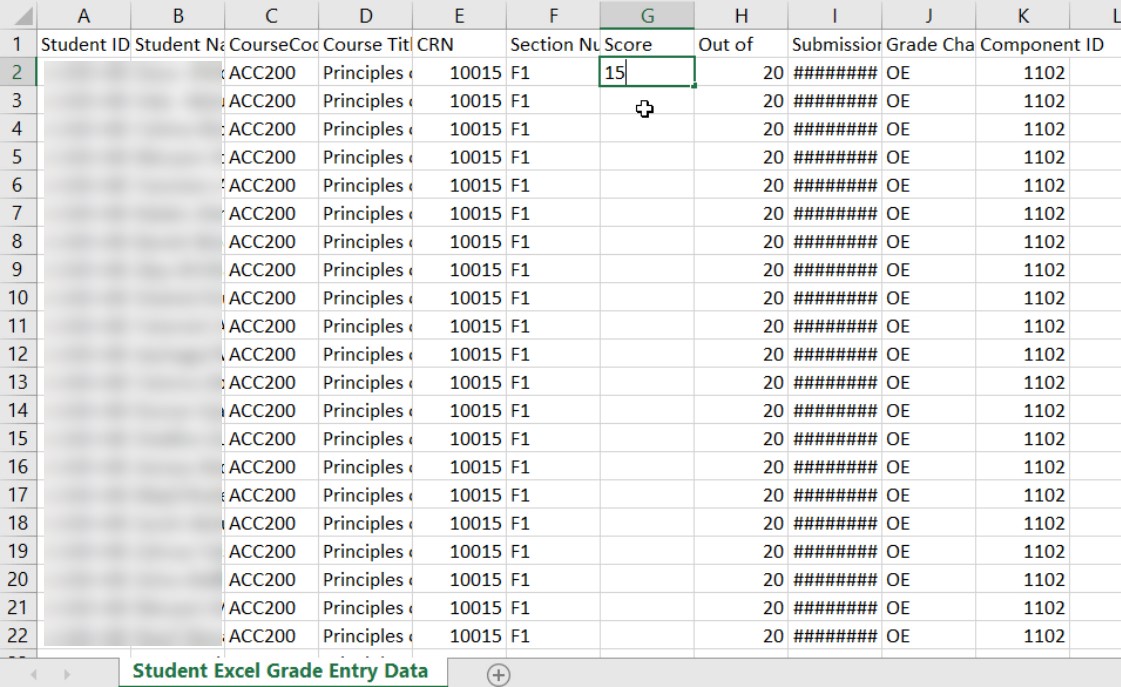
- Note that the sheet contains the list of student ID, student name, the maximum grade assigned to the Exam Type which was specified in step 5 in the previous section, etc. Fill the Score column (column G) for each student.
Note:
- You can sort the students based on student ID or name for an easier grade entry.
- You can enter the grades for a few students only and leave the rest empty.
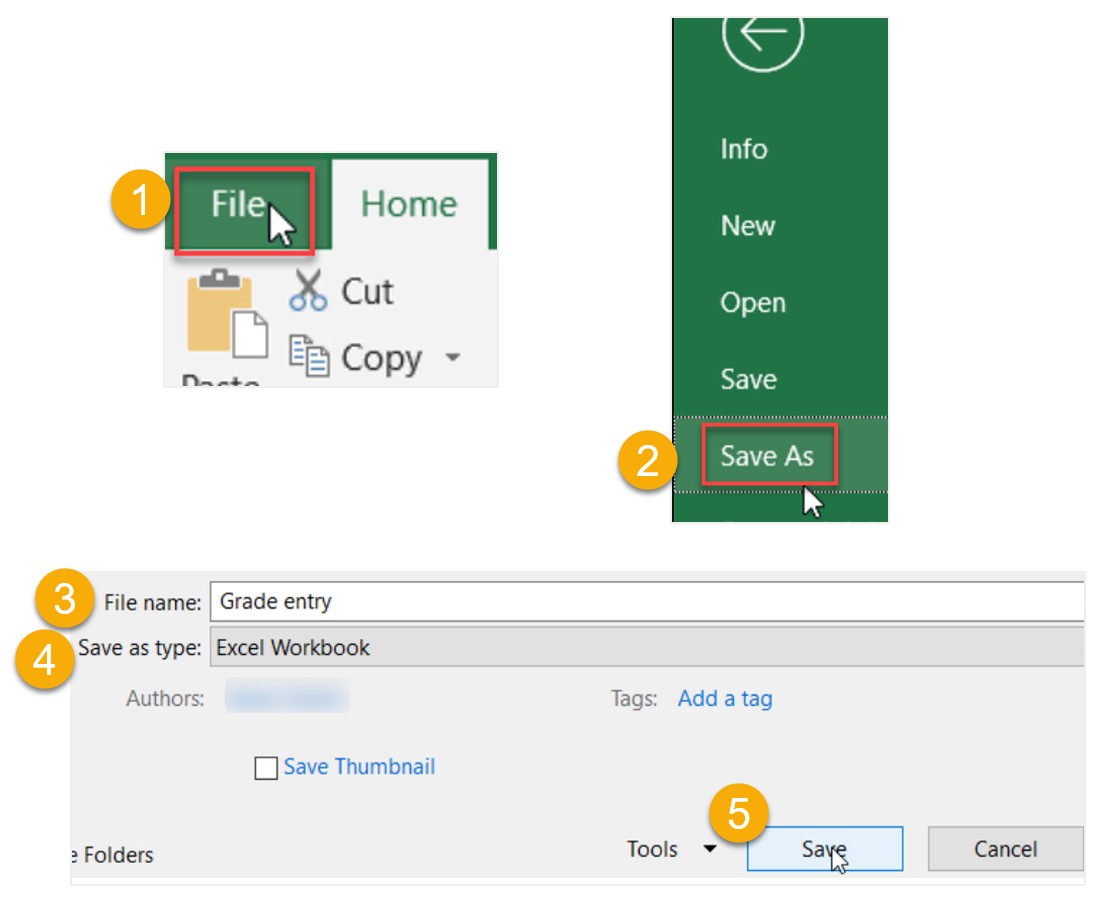
- Save the Excel Sheet in .xls format by following this sequence: Click on File -> Save As -> Enter the File name -> Choose Excel Workbook type -> Click on Save.
Import the Grade Entry Sheet to Banner
- Log in to Banner.
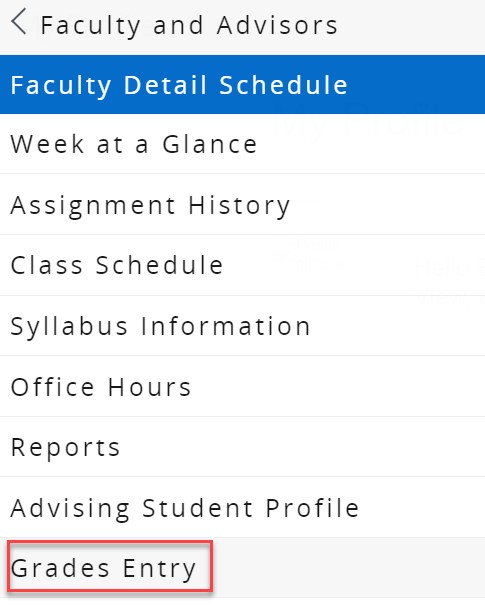
- Go to the menu on the left, click on Banner, then click on Faculty and Advisors and, and then on Grade Entry.
- Click on Gradebook.
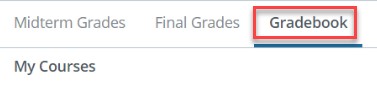
- Choose the course, which you have already filled the Excel sheet for, and click on Components.
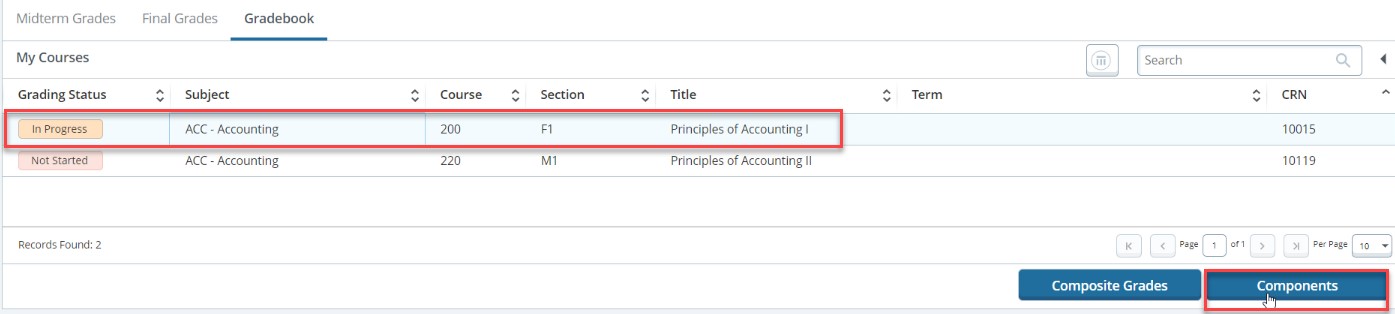
- Click on the Description that matches the Exam Type selected is step 5 in the first section of this article.

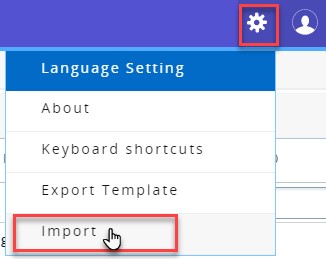
- From the navigator, click on the gear icon then on Import.
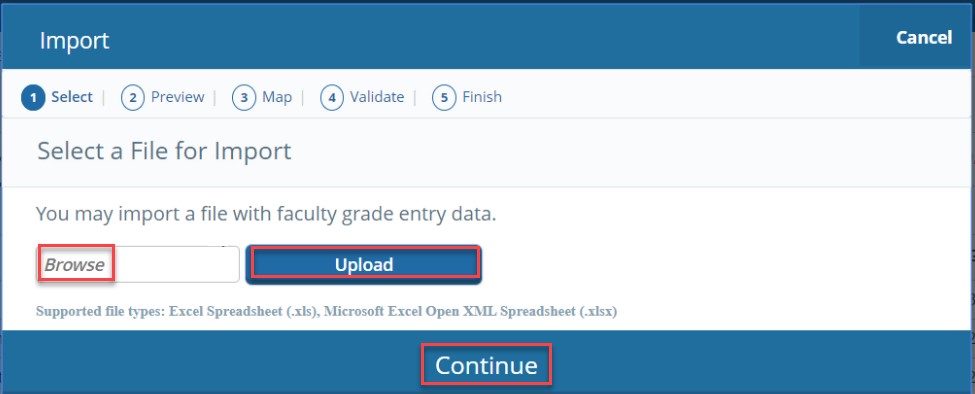
- Click on Browse, to locate the Excel Sheet, then click on Upload, and then on Continue.
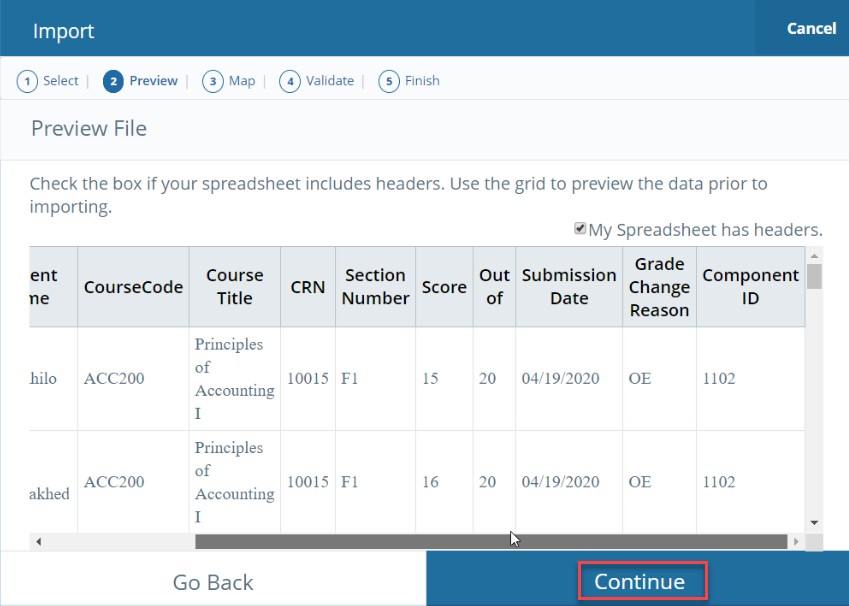
- Preview the data and then click on Continue.
- Click on Continue.
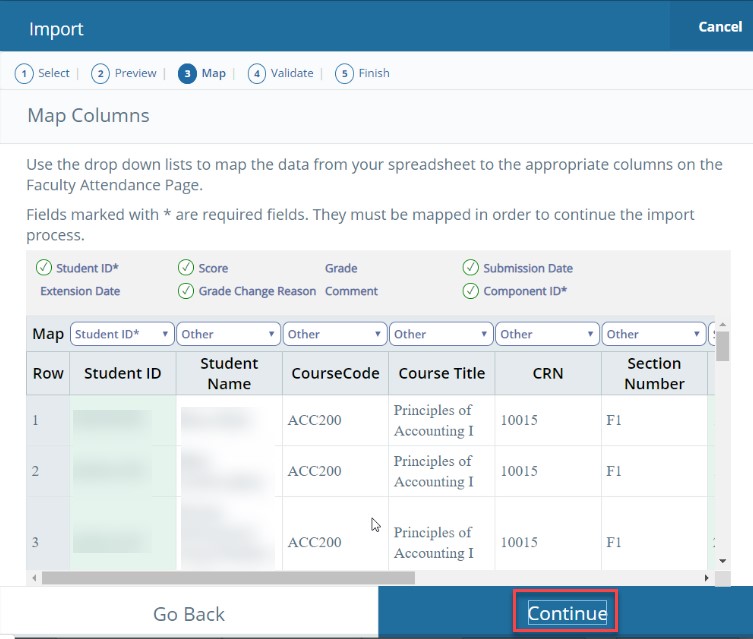
- Check the number of records that contain errors and click on Continue if the are no errors.
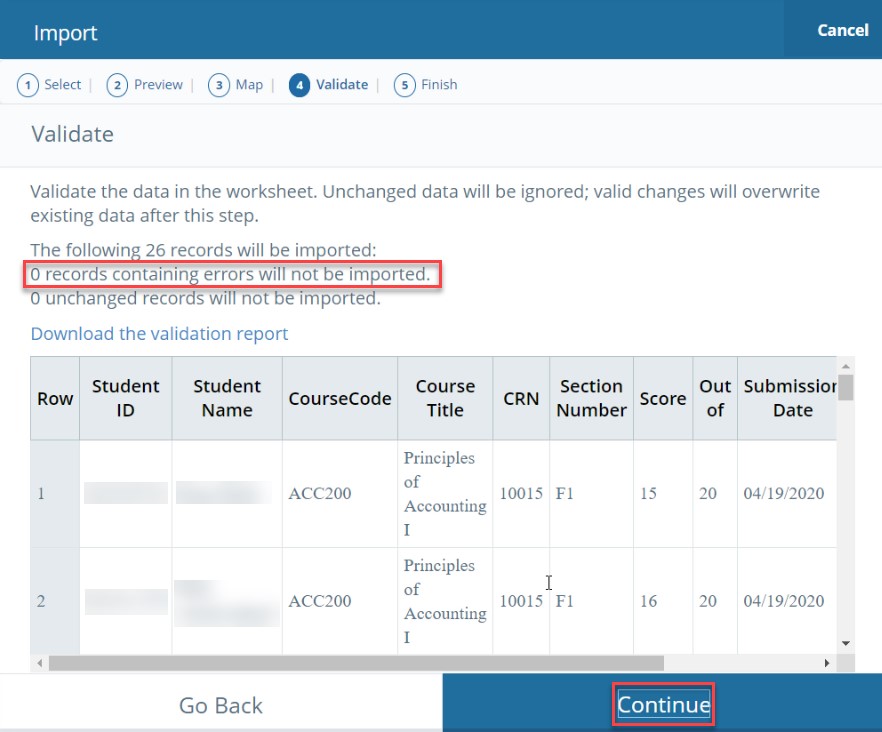
Note:
If there is an error or more, follow the below steps:
- Click on Download the validation report to locate the errors (the cells in the first column will be highlighted in red).
- Implement the needed changes in the Excel Sheet which you have already worked on and saved.
- Save the file.
- Repeat the steps in this section.
- Click on Finish.
Enter/Update the grades manually
- Log in to Banner.
- Go to the menu on the left, click on Banner, then click on Faculty and Advisors and, and then on Grade Entry.
- Click on Gradebook.
- Choose the course, which you have already filled the Excel sheet for, and click on Components.
- Click on the Description that matches the Exam Type selected is step 5 in the first section of this article.

- Enter the grade in the Score column, then scroll down and click Save. Noting that you can enter the grade/update at once for 20 students maximum.
Was this article helpful?
Related articles
Banner SIS
Original source: https://it.ajman.ac.ae/docs/grade-entry