


2. Set Up Multi-Factor Authentication for AU Accounts
To set up the authenticator app, please follow the steps below:
Set up the Authenticator App via a Web Browser
-
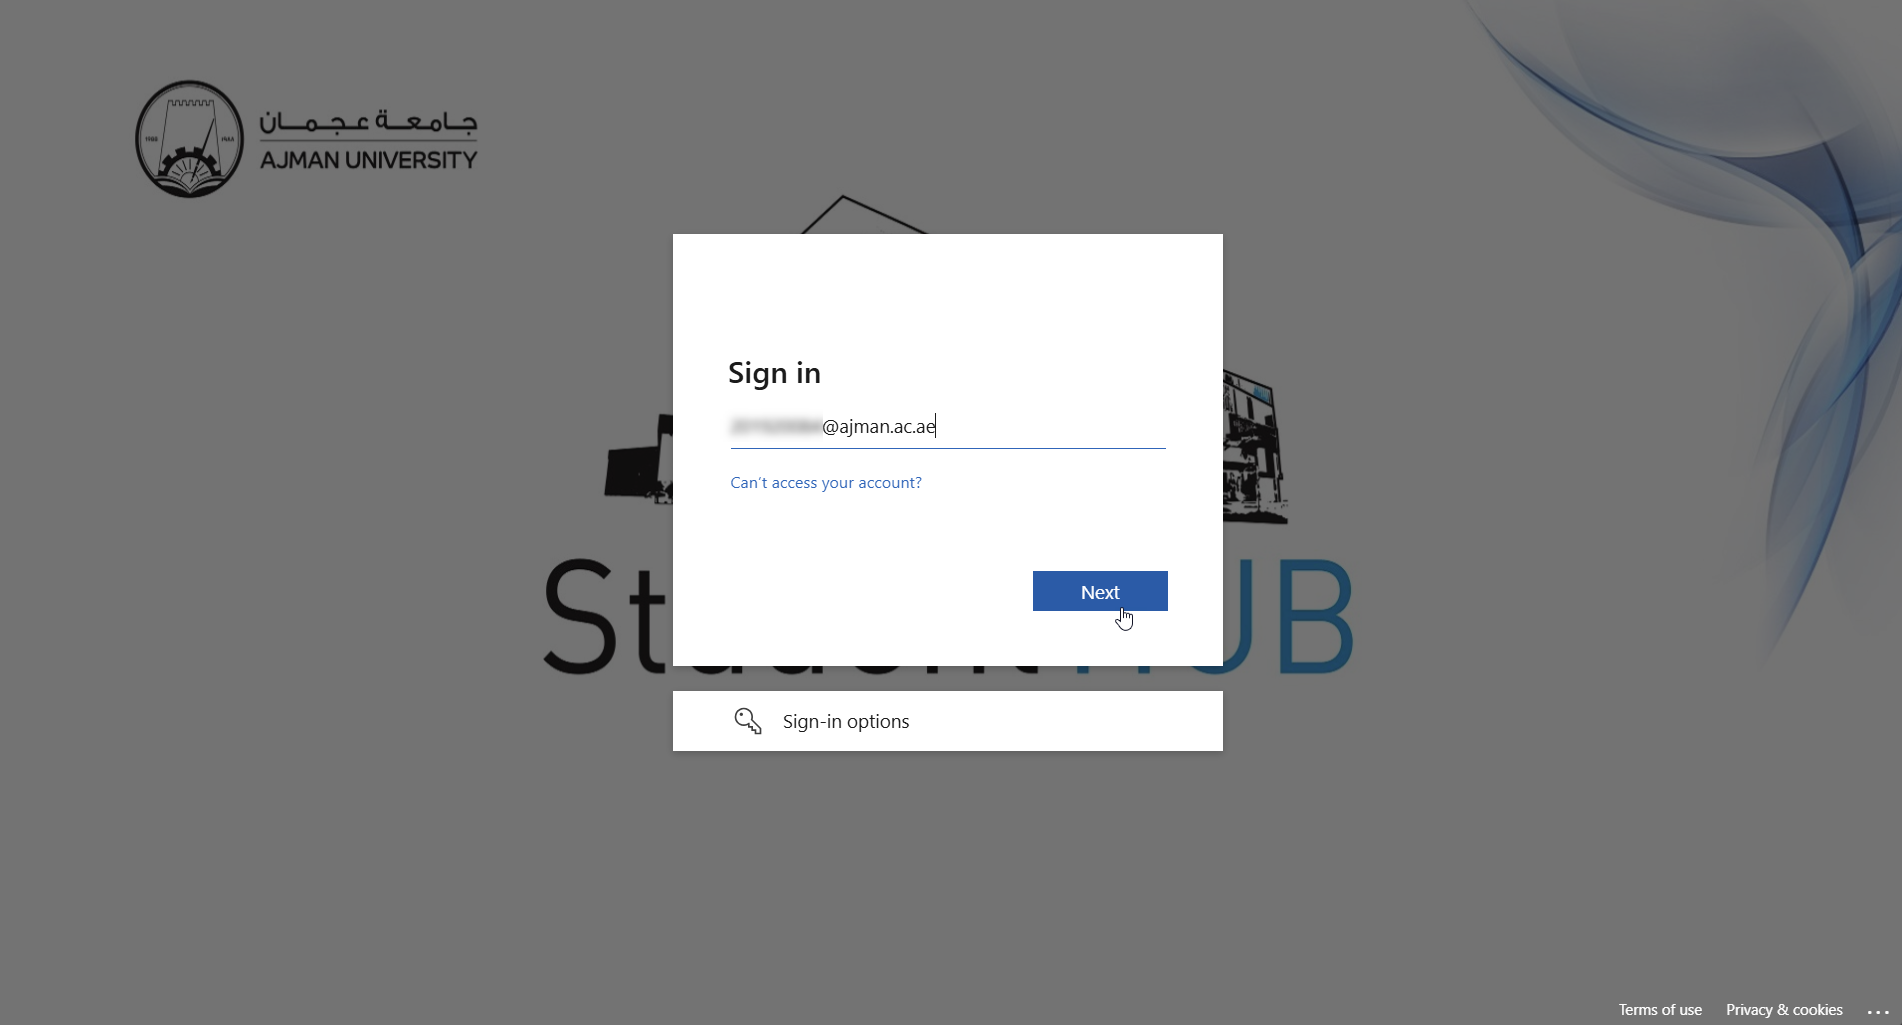
Go to the Outlook webpage and sign in with your AU email address and password.
-
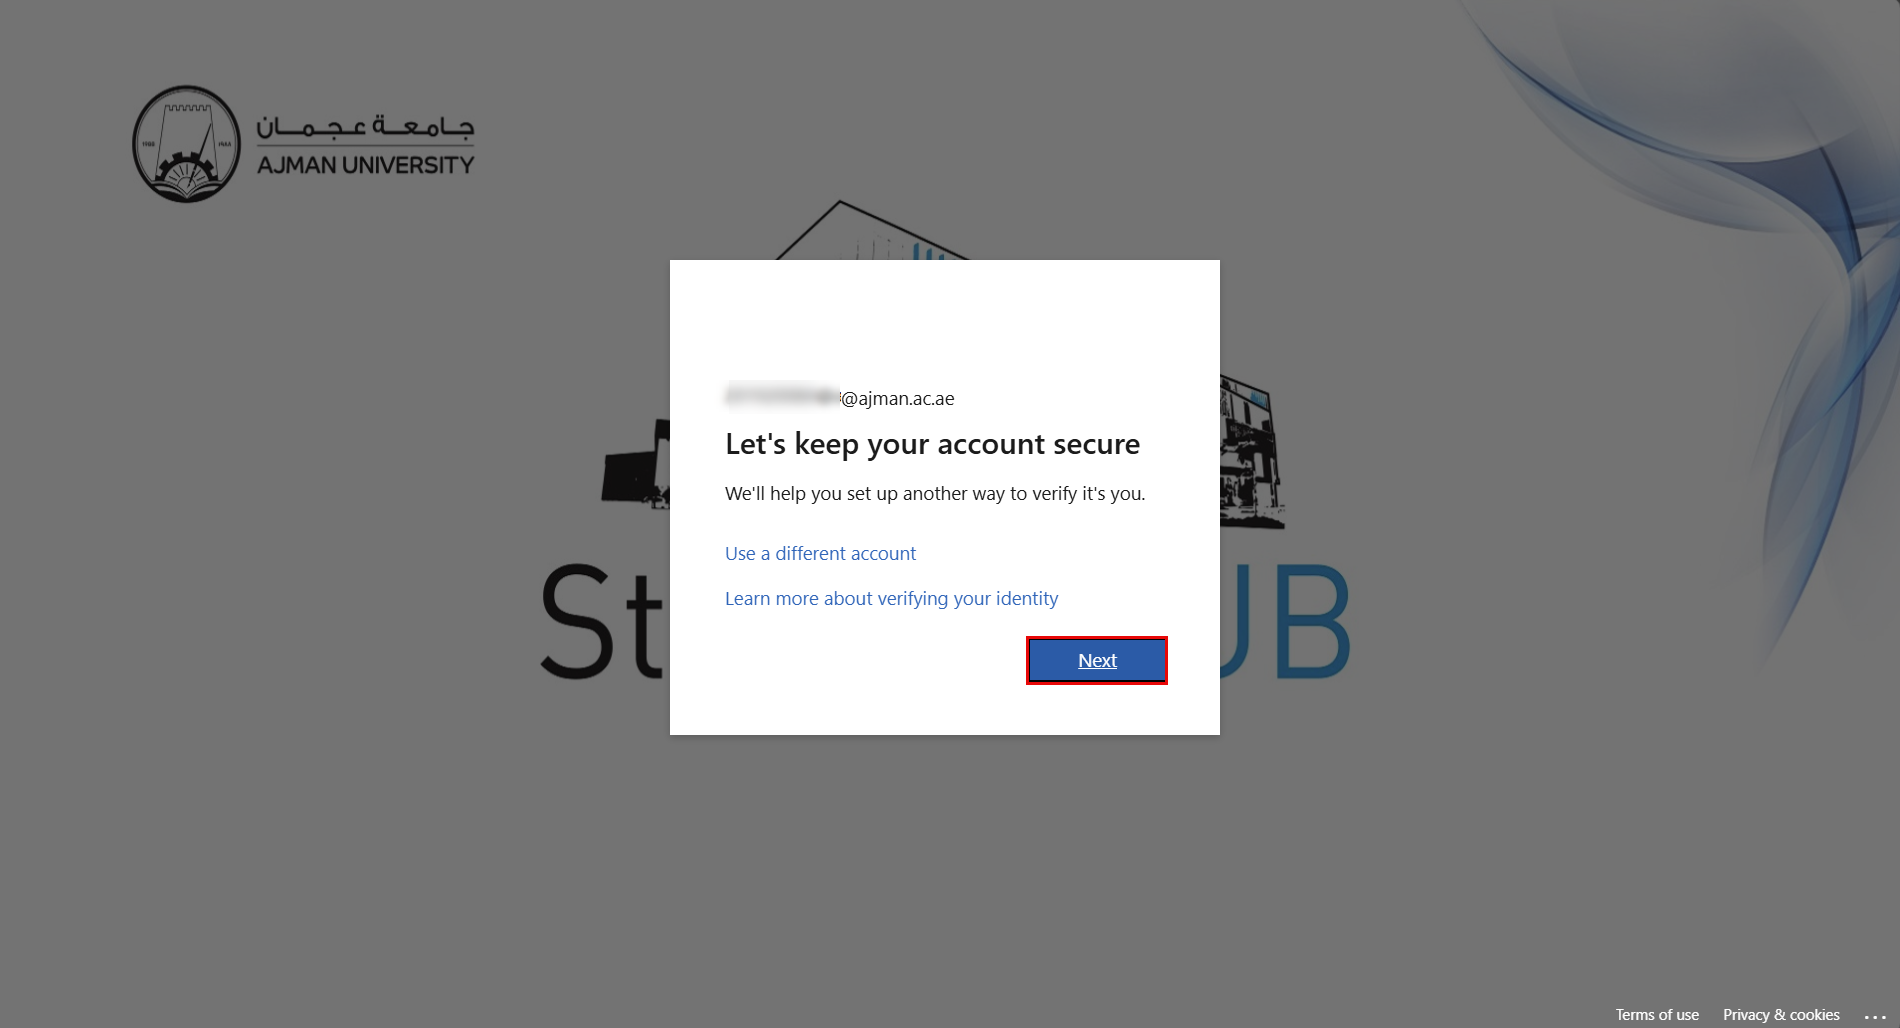
Click Next to begin the Multi-Factor Authentication (MFA) setup process.
-
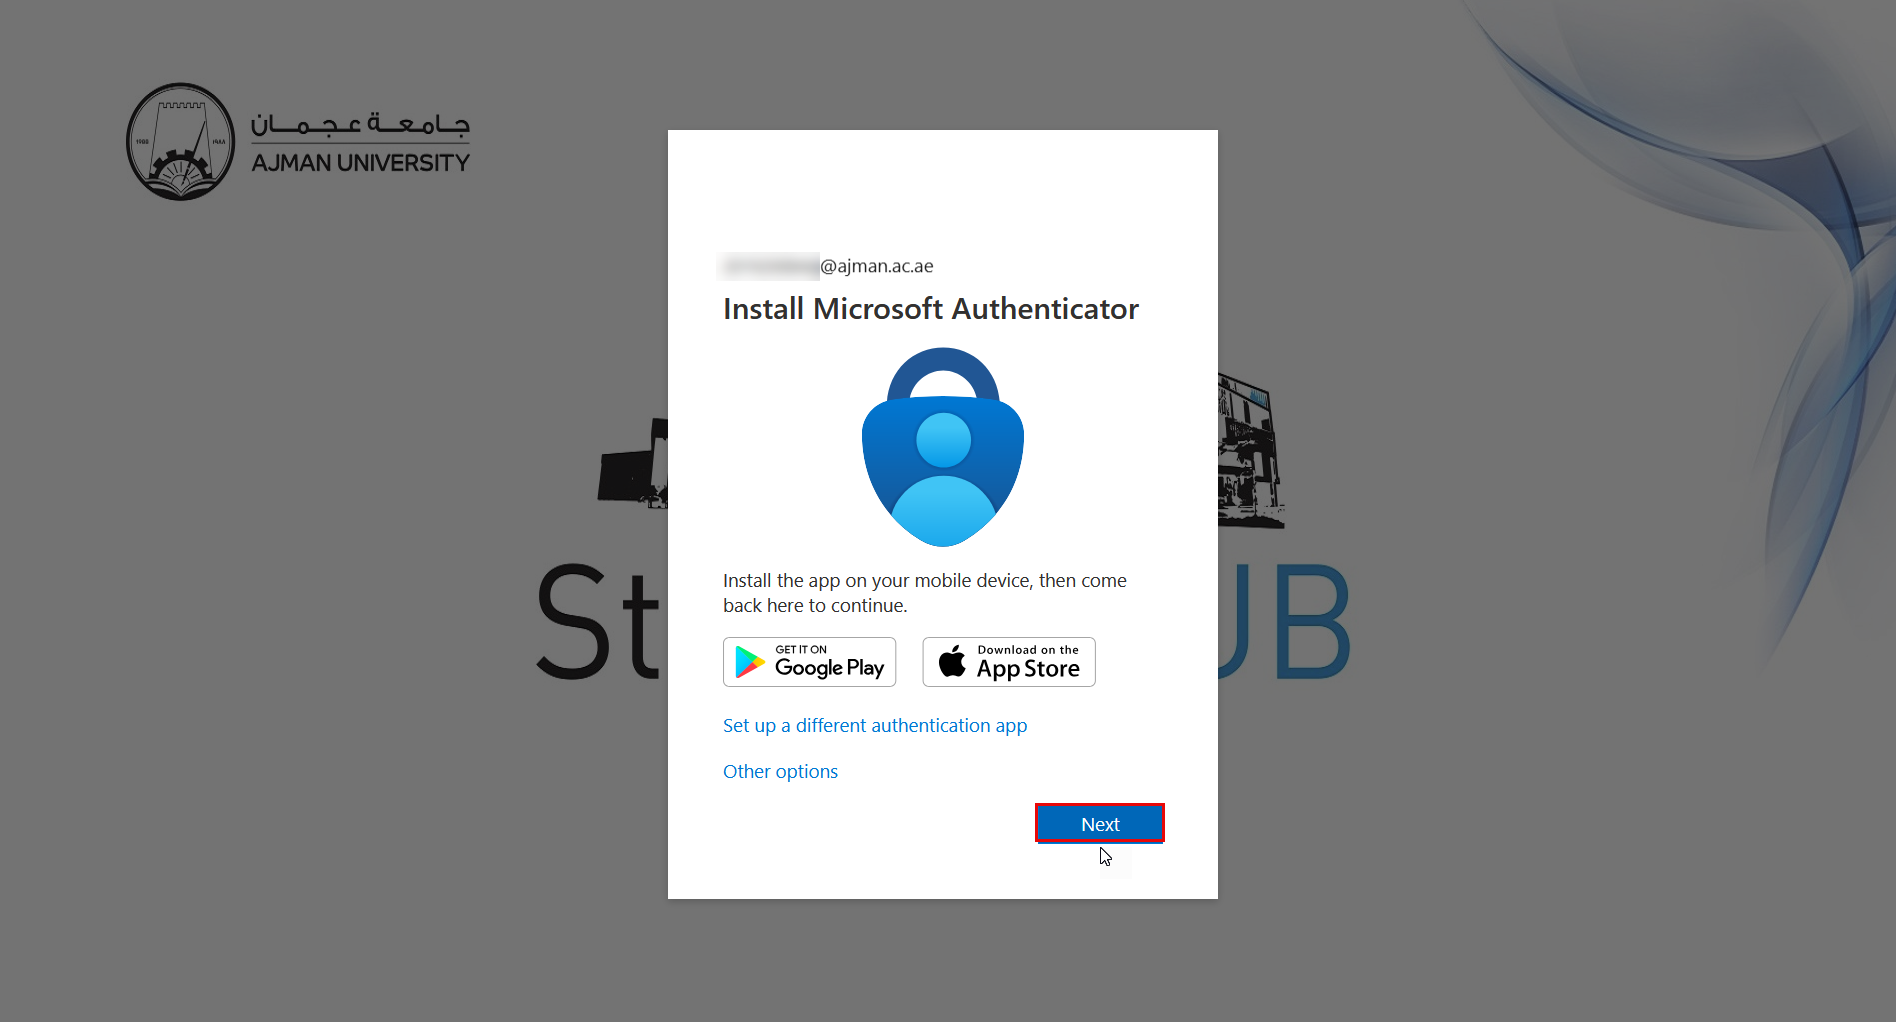
Install the Microsoft Authenticator app on your mobile device, then click Next to continue.
Note:
Please refer to the following user manual for instructions on setting up Multi-Factor Authentication (MFA):
-
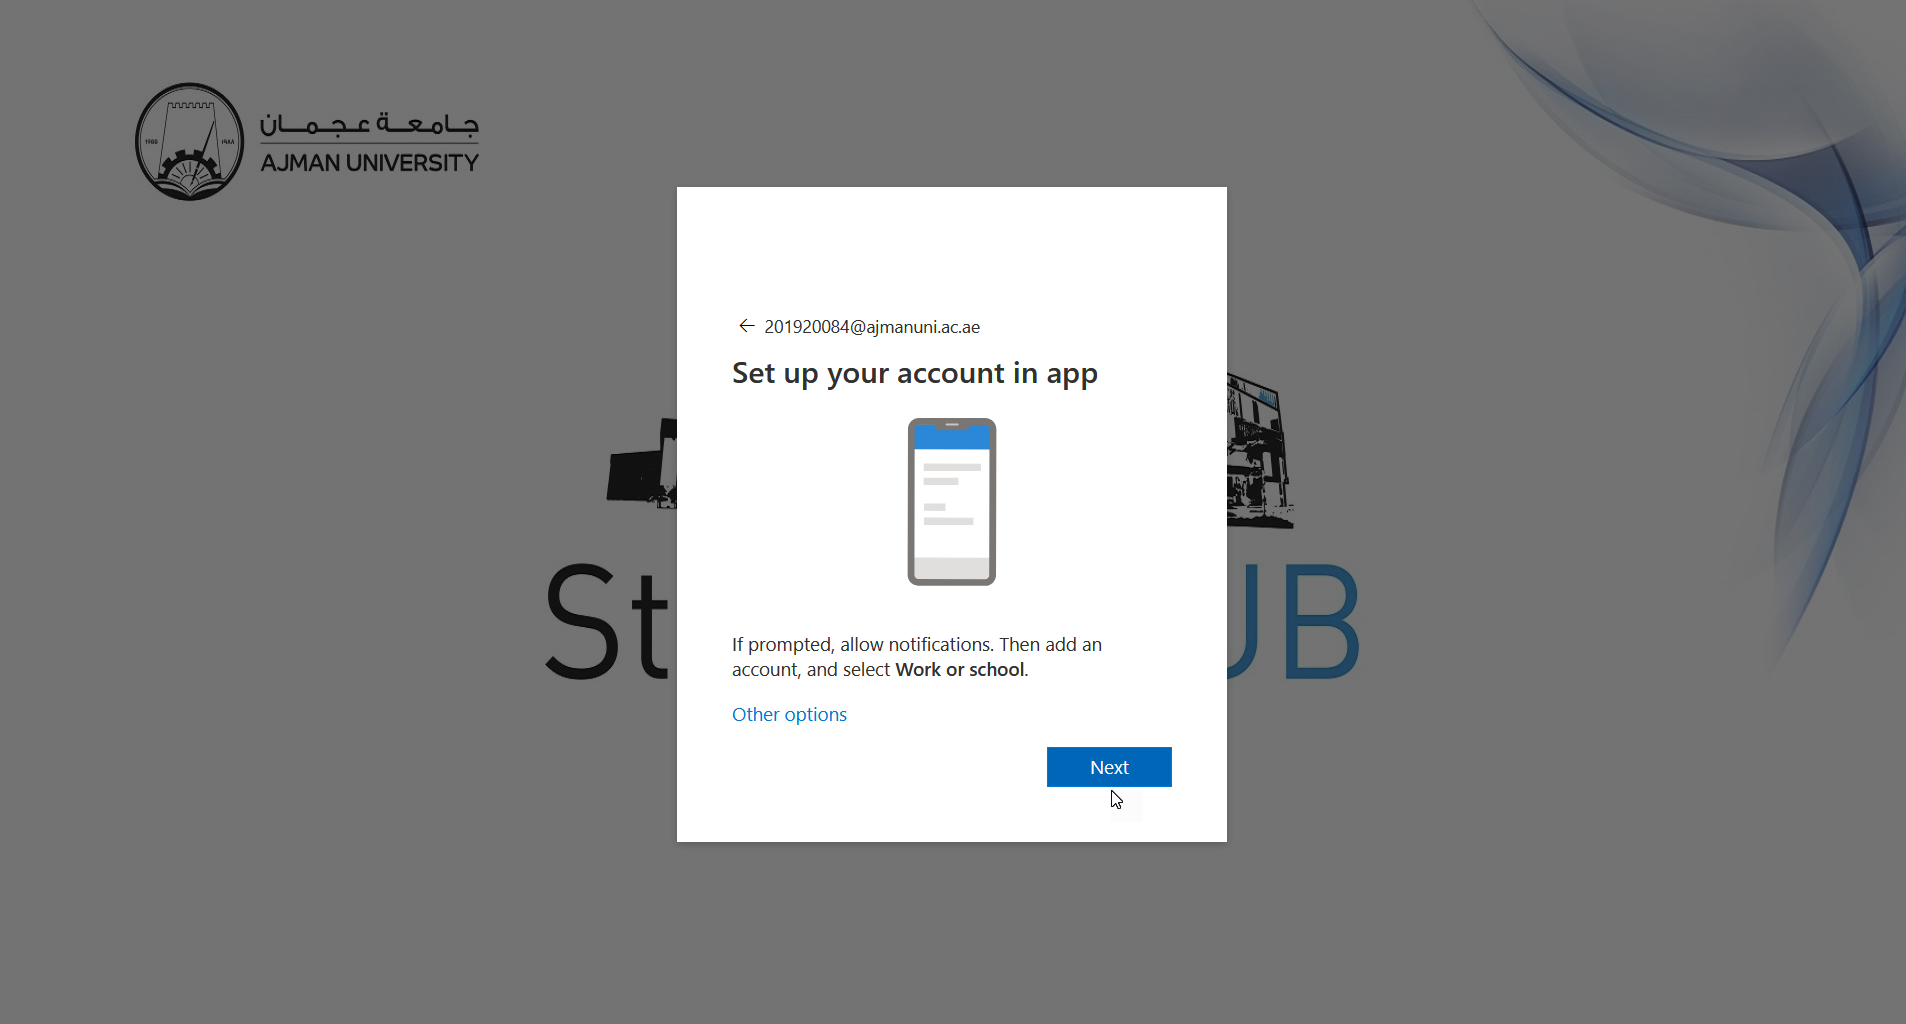
Open the Microsoft Authenticator app and begin setting up your account.
-
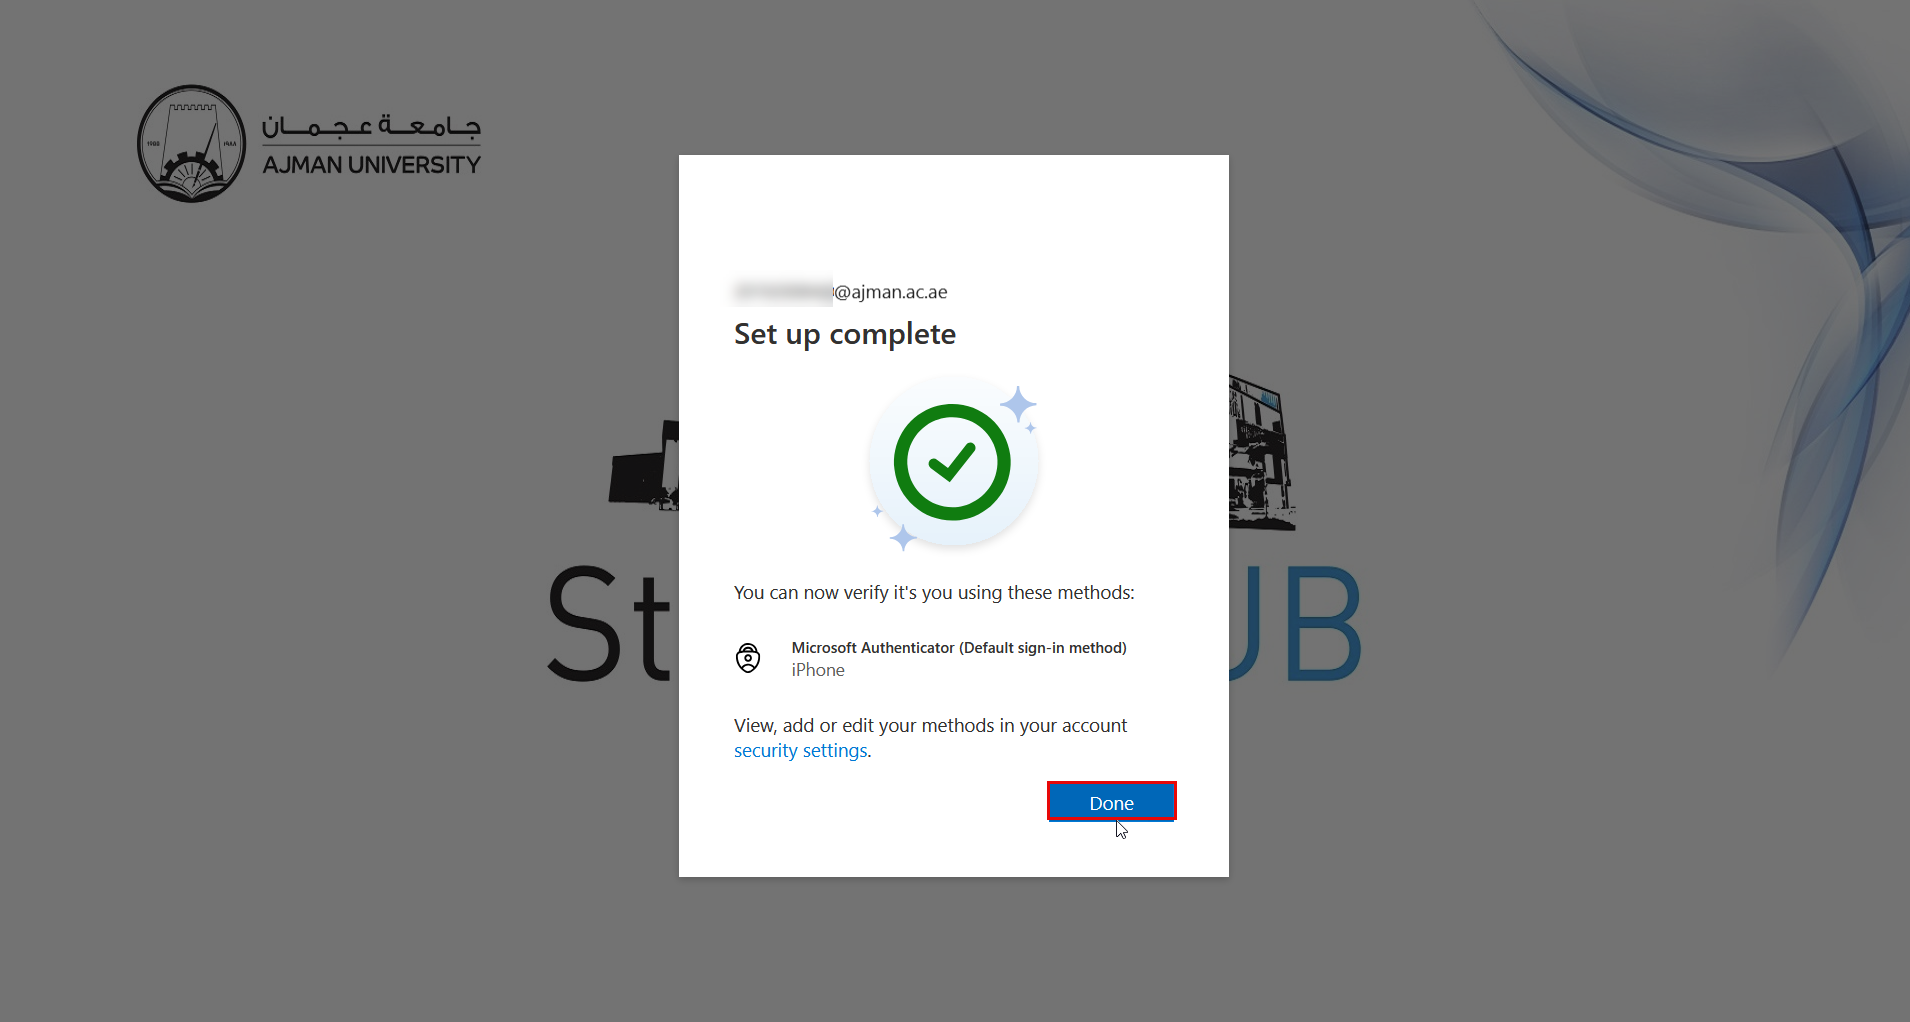
A confirmation message will appear indicating that the setup is complete.
Set up the Authenticator App via a Mobile Device
After installing the Microsoft Authenticator App, you can set it up by following the steps below:
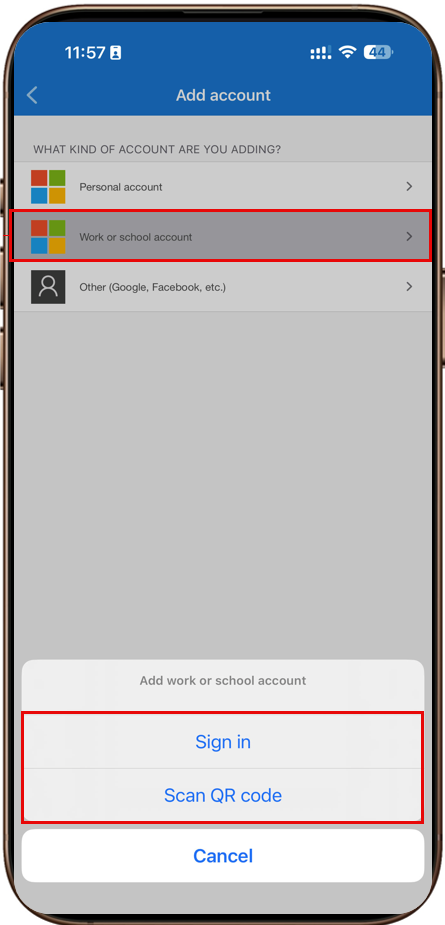
- Launch the app and tap Add account.
- Tap on Work or school account. You now have two options for adding your email address.
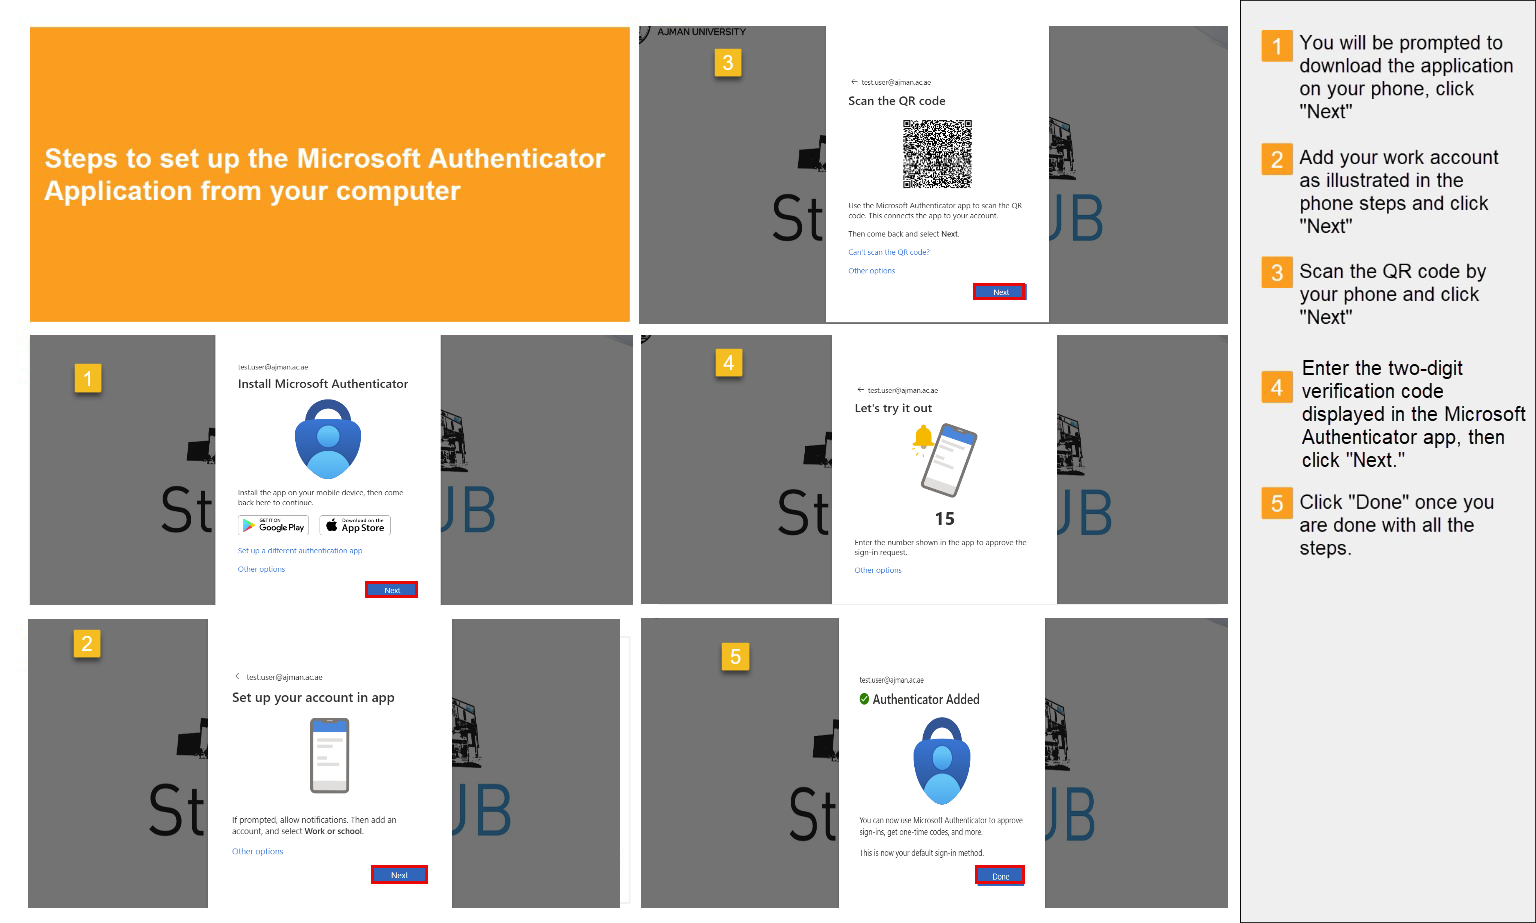
Option 1: Scan QR Code Method
On your computer, follow the steps below to complete the app setup:
Option 2: Sign-In
-
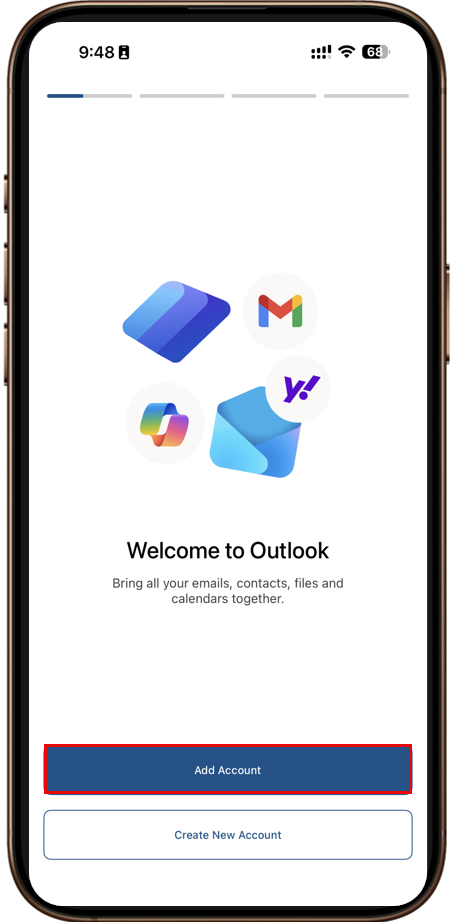
Open the Outlook mobile app on your device, then tap Add Account to begin the setup process.
-
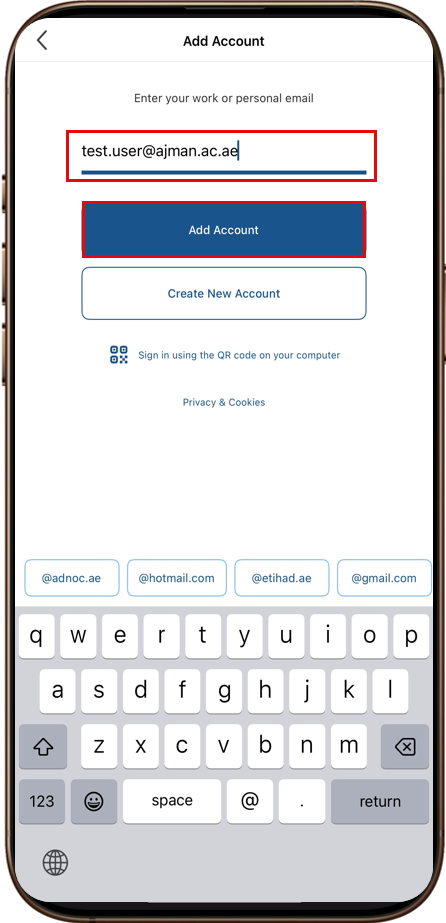
Enter your Ajman University email address, then tap Add Account.
-
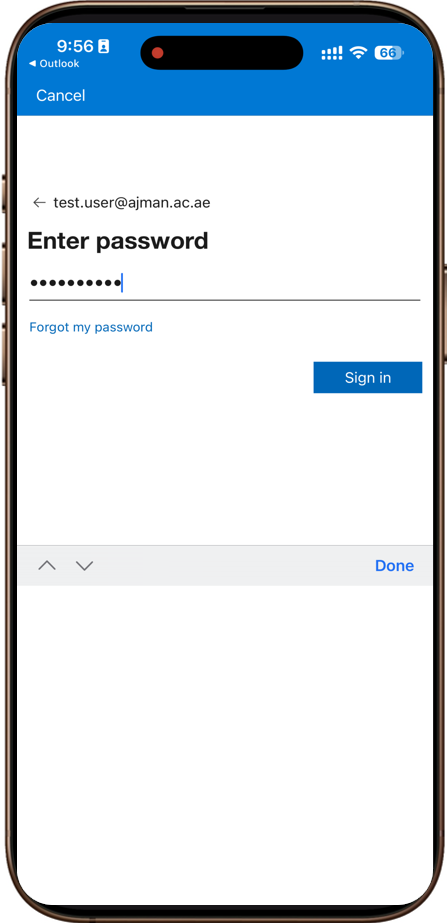
Enter your password, then tap Sign in.
-
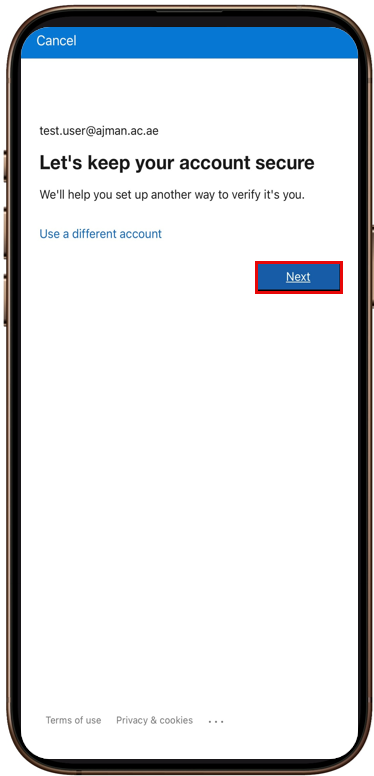
The Let's keep your account secure page will appear. Tap Next to proceed with the verification and security setup process.
-
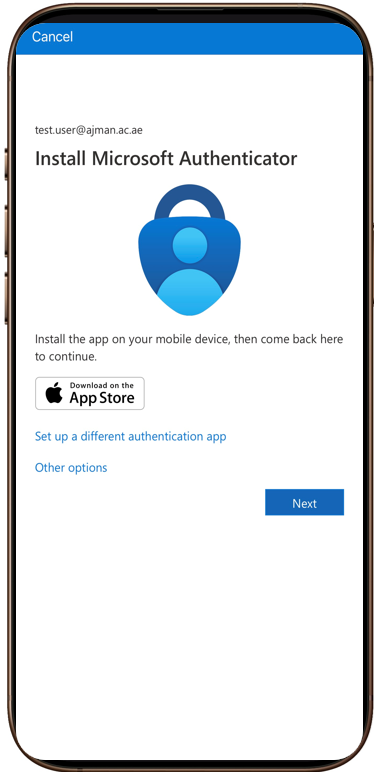
If Microsoft Authenticator is not already installed on your mobile device, download and install it from the App Store or Google Play Store. Once the installation is complete, return to this page and tap Next to continue.
-
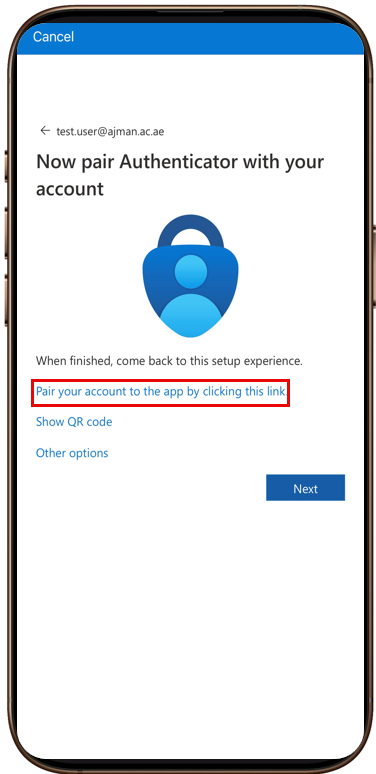
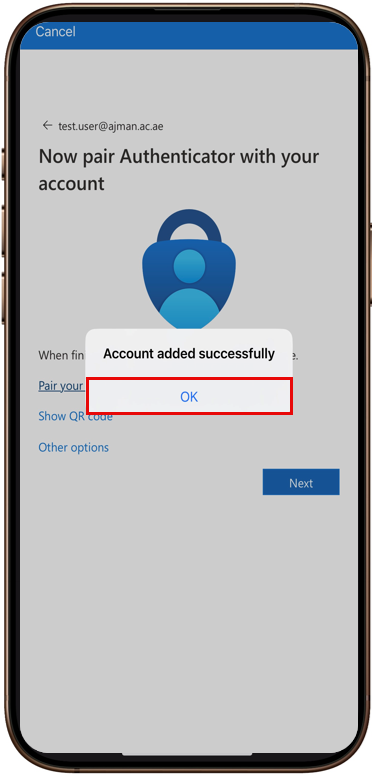
On the Now pair Authenticator with your account page, tap Pair your account to the app by clicking this link. Once the pairing is complete, a confirmation message will appear indicating that your account has been added successfully. Tap OK to continue.
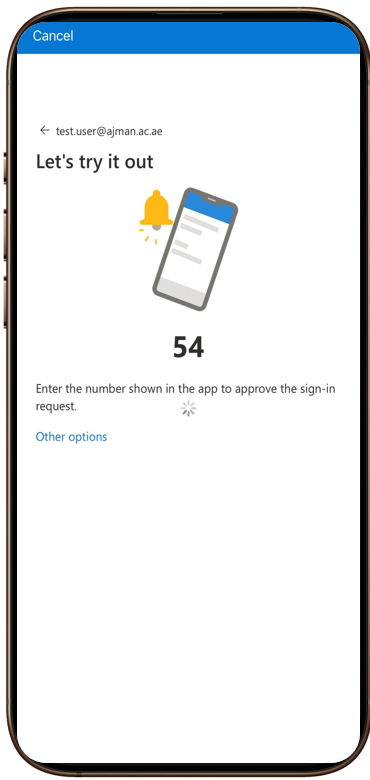
- A two-digit verification number will appear on the sign-in screen. Keep this page open and make a note of the number, as you will need to enter it in the Microsoft Authenticator app to approve the sign-in request.
Note:
Ensure that notifications are enabled for the Microsoft Authenticator app on your device. You will receive push notifications to approve sign-in requests when accessing AU services.
-
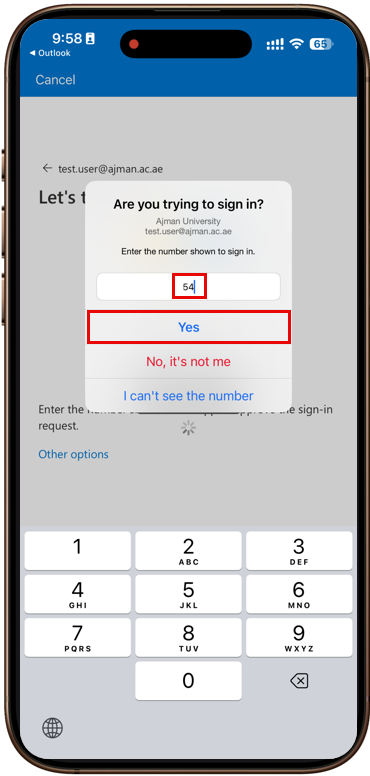
In the Microsoft Authenticator app, enter the verification number displayed on the sign-in screen, then tap Yes to approve the sign-in request.
-
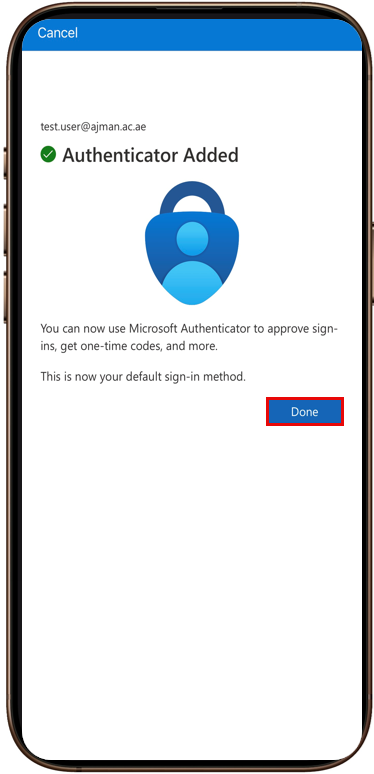
A confirmation message will appear indicating that Microsoft Authenticator has been successfully added as your default sign-in method. Tap Done to complete the setup process.
-
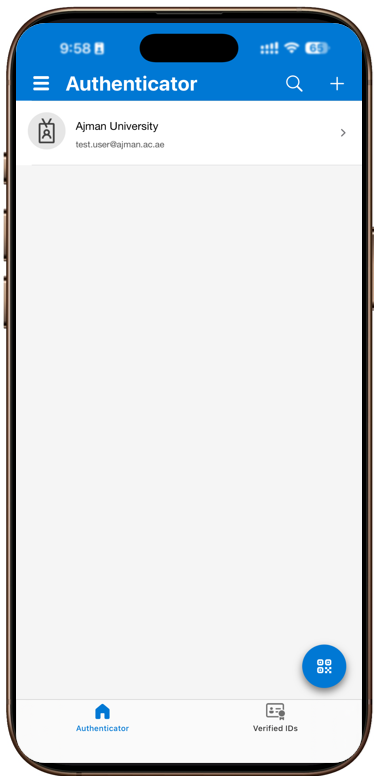
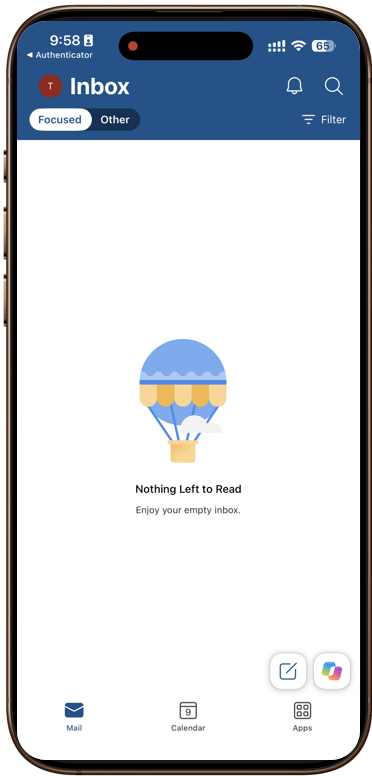
Your Ajman University account should now appear in the Microsoft Authenticator app, and your AU email mailbox should open successfully in Outlook. This confirms that your account has been added and the sign-in process is complete.
Notes:
- You can complete the setup using any AU service that supports Single Sign-On (SSO) with your AU email account.
- You can follow the same steps to set up Microsoft Authenticator on more than one device.
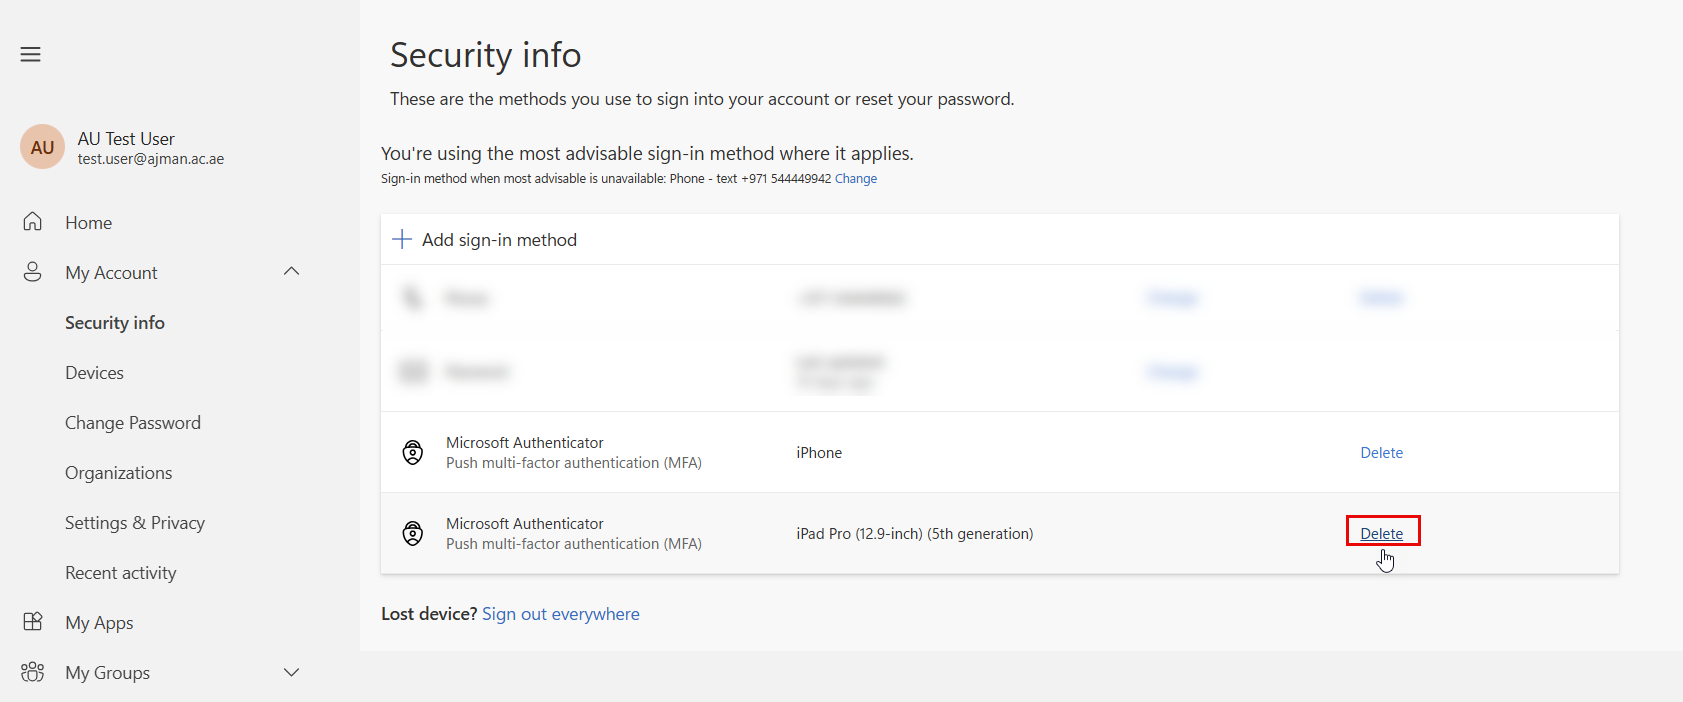
- If you would like to remove an additional authenticator that you have already set up, open the Microsoft Authenticator app and remove the account. Then, go to the Security Info page in Outlook and remove the corresponding device from there as well.
Was this article helpful?
Related articles
Multi-factor Authenticator (MFA)
Original source: https://it.ajman.ac.ae/docs/set-up-multi-factor-authentication-for-au-accounts